欢迎大家赞助一杯啤酒🍺 我们准备了下酒菜:Formal mathematics/Isabelle/ML, Formal verification/Coq/ACL2/Agda, C++/Lisp/Haskell
Eclipse CDT
| 第58行: | 第58行: | ||
==Related Docs== | ==Related Docs== | ||
*[http://www.ibm.com/developerworks/cn/opensource/os-ecl-vscdt/index.html 将 Visual Studio C 和 C++ 项目迁移到 Eclipse CDT] | *[http://www.ibm.com/developerworks/cn/opensource/os-ecl-vscdt/index.html 将 Visual Studio C 和 C++ 项目迁移到 Eclipse CDT] | ||
| + | *[http://www.ibm.com/developerworks/cn/linux/opensource/os-ecc/index.html 用 Eclipse 平台进行 C/C++ 开发 -- 如何使用 C/C++ 开发工具箱(CDT]) | ||
| + | *[http://www.ibm.com/developerworks/cn/opensource/os-ecl-cdt1/index.html 构建基于 CDT 的编辑器,第 1 部分: C/C++ 开发工具模型] | ||
| + | *[http://www.ibm.com/developerworks/cn/opensource/os-ecl-cdt2/index.html 构建基于 CDT 的编辑器,第 2 部分: 在 CDT 中显示文本] | ||
| + | *[http://www.ibm.com/developerworks/cn/opensource/os-ecl-cdt3/index.html 构建基于 CDT 的编辑器,第 3 部分: 基本的 CDT 解析] | ||
| + | *[http://www.ibm.com/developerworks/cn/opensource/os-ecl-cdt4/index.html 构建基于 CDT 的编辑器,第 4 部分: 高级 CDT 解析和持久文档对象模型] | ||
| + | *[http://www.ibm.com/developerworks/cn/opensource/os-ecl-cdt5/index.html 构建基于 CDT 的编辑器,第 5 部分: 将 PDOM 用于代码完成] | ||
2007年2月3日 (六) 18:25的版本
Eclipse C/C++ Development Tooling - CDT
CDT 3.1 runs on Eclipse 3.2 need install Eclipse Graphical Editing Framework
CDT Eclipse 3.1.x Based Releases (CDT 3.0.x)
目录 |
Install CDT
At first install Eclipse Graphical Editing Framework
and then install CDT
uninstall CDT
1. Shutdown the eclipse shell that is running CDT
2. Remove the CDT plugins
- Navigate to the directory where the CDT plugins are installed (typically eclipse/plugins)
- Remove the following plugins: org.eclipse.cdt.*
3. Remove the CDT metadata
- Navigate to the workspace/.metadata/.plugins directory
- Remove the following directories (if they exist): org.eclipse.cdt.*
4. Restart Eclipse
Examples
Creating a simple Managed C++ Project
This section will use an example to create the familiar "Hello World!" C++ program. First, ensure that you have the CDT installed within Eclipse, as described above. Open a C/C++ Perspective and complete the following steps:
1. Click "Projects" from the menubar and ensure there is no checkmark beside "Build Automatically" -- if there is one, click "Build Automatically" to deselect it. ("Build Automatically" disables the build menus and buttons; you may want to turn it on later to avoid having to rebuild manually when modifying your projects.)
2. In the "C/C++ Projects" View, right click and select "New Project ..."
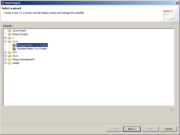
3. Expand "C++", then select "Managed Make C++ Project"
4. Enter a name for the new project and select "Finish". Note: you can determine the build Settings from this dialog, but we will do so later, in the build section.
5. In the "C/C++ Projects" view, right click and select "New" > "File". Name your file "hello.cpp" and click "Finish".
6. Copy or type the following text into the "hello.cpp" file:
    #include <stdio.h>
    int main()
    {
        printf("hello, world\n");
    }
7. Save the file.
There are several ways to initiate builds and to run the executable from the menu, toolbars, keyboard, and other objects. Descriptions of them all can be found in the Eclipse documentation. These work from the project object in the "C/C++ Projects" panel:
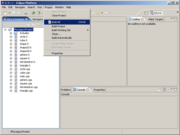
8. Right click the project panel and select "Build Project". A popup and the Console tab will show the build status. If there are errors they will show up in the "Problems " panel.
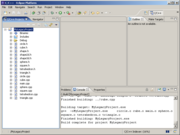
9. Right click the project panel and select "Run As" > "Run Local C/C++ Application". The Console tab will show your program's output. The "Debug" panel will show the exit status, or the state of the program if it failed to terminate correctly.


